Binoculars can be optically sound and still feel awkward, blurry, or unstable when the fit and controls are adjusted in the wrong order. A reliable owner routine starts with eyecups and interpupillary distance, then moves to focus and diopter calibration, target acquisition, steady holding, cleaning, storage, and symptom checks. The exact control layout can vary by model, so the manual remains the final authority when a ring, lock, eyecup, or accessory interface works differently. The goal is not constant tweaking, but a repeatable setup that tells you when to adjust, when to leave a setting alone, and when to stop troubleshooting.
Why correct use starts with fit, not the focus wheel
Learning how to use binoculars correctly starts before you touch the focus wheel. If the eyecups place your eyes too close or too far from the eyepieces, or the barrels are not spaced for your eyes, a sharp optical system can still show blackouts, clipped edges, or two fields that refuse to merge comfortably. Those symptoms are easy to mistake for poor focus because turning the focus wheel changes the image enough to feel like progress. In practice, fit has to be settled first so later adjustments are solving the right problem.
The useful order is simple: fit the eyecups, set the interpupillary distance, calibrate focus and diopter, then use the main focus control for normal viewing. Once that baseline is repeatable, stability, cleaning, storage, and troubleshooting become easier because you are not changing several variables at once. If you want a narrower walkthrough focused only on the first-use adjustments, use this repeatable binocular setup sequence. That separation matters because setup is a calibration task, while everyday use is mostly about finding the target, focusing for distance, holding steadily, and protecting the instrument.

The Nature DX 8x42 uses 8x magnification, 42mm objective lenses, phase-coated BaK-4 prisms, and fully multi-coated optics. Its waterproof body is protected by rubber armor for outdoor use. The conventional 8x42 layout provides the eyecups and barrel spacing needed to practice fit before touching the focus control.
Check on AmazonIf you click this link and buy, we earn a commission at no additional cost to you.
Identify your binocular controls before changing anything
Before turning rings at random, look at the actual control layout on your pair. Common controls include a central hinge, eyecups, a center focus wheel, and a diopter adjustment, but the diopter may sit on an eyepiece or be integrated into another control, and some designs focus each eyepiece independently. Locks, click stops, twist directions, and adjustment limits can also differ. A quick manual check is better than assuming every binocular follows the same sequence.
Start by locating only the controls you need for owner-level use, then leave anything unfamiliar alone until the manual identifies it. The most useful first check is whether the binocular is center-focus or individual-focus, because that determines how you will calibrate and refocus it. If labels such as eye relief, field of view, close focus, or interpupillary range are part of the confusion, this guide to understanding binocular specifications in practical terms explains what those measurements can and cannot tell you. Specifications can describe limits and geometry, but they do not replace the physical check of whether your eyes sit comfortably behind the eyepieces.
- Find the eyecups and note whether they twist, slide, fold, or lock.
- Find the hinge or bridge used to change the spacing between the eyepieces.
- Identify the normal focus control and the separate diopter control, if present.
- Check the manual before forcing any ring, lock, cap, or movable part past its normal travel.
Once those controls are identified, resist the urge to optimize every setting at once. Keep the unfamiliar controls where they are until you know what they do. The next step is to establish eye position and barrel spacing, because those two variables determine whether both eyes are receiving a usable field before focus is judged. A stable baseline makes every later adjustment easier to evaluate.

The PROSTAFF P3 8x42 provides 20.2mm eye relief and a 377-foot field of view at 1,000 yards. Its waterproof, fogproof body uses rubber armor and a large center focusing knob. That familiar layout makes it useful for identifying the hinge, eyecups, focus wheel, and diopter before changing settings.
Check on AmazonIf you click this link and buy, we earn a commission at no additional cost to you.
Set eyecups and interpupillary distance first
Eyecups control how close your eyes sit to the eyepieces. People who wear glasses usually need the eyecups lower so the glasses do not hold the eyes too far back, while people without glasses usually need more extension, but intermediate positions can be useful when the design provides them. The practical test is the view, not the label: you want a full field without persistent dark crescents or a narrow tunnel effect. If a position looks wrong, change one eyecup step at a time instead of pressing the binocular harder against your face.
Next, adjust interpupillary distance by moving the two barrels or eyepiece assemblies until the left and right views merge into one comfortable circular field. Make this adjustment while looking at a distant, easy-to-recognize target, because a stable target makes alignment easier to judge. If you still see overlapping circles, uneven black borders, or a view that feels difficult to center, change the spacing slightly and retest. Once the spacing is right, leave it alone unless another person uses the binoculars or the hinge gets moved during storage or carrying.

The Bushnell H2O 8x42 uses twist-up eyecups and a waterproof, fogproof chassis. Its 8x42 configuration includes fully multi-coated optics and BaK-4 prisms. The eyecup design makes it directly relevant to testing eye position and obtaining a complete field before judging focus.
Check on AmazonIf you click this link and buy, we earn a commission at no additional cost to you.
Calibrate focus and diopter for your eyes
Focus and diopter do different jobs. The normal focus control follows changes in target distance, while the diopter compensates for the difference between your left and right eyes so both sides can appear sharp at the same time. If you keep changing the diopter whenever the target moves, you are using the calibration control as if it were the normal focus wheel. That usually makes the setup less consistent rather than more precise.
Choose a stationary target with clear detail and enough distance that tiny body movements do not dominate the view. Follow the procedure for your exact focusing system, and make small adjustments near the point of best sharpness instead of sweeping the control back and forth. After calibration, look with both eyes and confirm that the image is comfortable and that ordinary distance changes can be handled by the intended focus control. If the two sides still cannot be brought into acceptable focus, move to the troubleshooting sequence later in this guide rather than forcing the controls.
Center-focus binoculars
For a typical center-focus design, use the main focus control to sharpen the reference target for the eye specified by the manual, then use the diopter adjustment to bring the other eye into focus on the same target. After both sides agree, reopen both eyes and make only small corrections if the image still feels slightly mismatched. From that point forward, normal changes in viewing distance should be handled with the center focus wheel. If someone else uses the pair, expect to repeat the calibration because the diopter setting is personal.
Individual-focus binoculars
Individual-focus binoculars do not use a single center wheel to refocus both sides together. Each eyepiece is focused separately for the same target, so the left and right settings must both be correct before the image feels balanced. Changing target distance may require adjusting both eyepieces again, depending on the design and distance involved. That is a different operating pattern, not a defect, which is why identifying the focus system before setup prevents unnecessary troubleshooting.

The Outland X 8x42 uses twist-up eyecups, a large focus knob, and a diopter adjustment range of plus or minus 3. It is waterproof and nitrogen filled, with BaK-4 prisms and multi-coated optics. Its control set makes it a practical reference for separating routine focusing from eye-specific diopter calibration.
Check on AmazonIf you click this link and buy, we earn a commission at no additional cost to you.
Bring the binoculars to the target without losing it
A common beginner problem is finding a subject with the naked eye and then losing it as soon as the binoculars come up. The better sequence is to keep looking directly at the target, raise the binoculars into your existing line of sight, and only then look through the eyepieces. Do not drop your head to meet the binoculars if that changes the direction you were already facing. This small habit keeps the target location tied to your body position instead of forcing you to search a magnified field from scratch.
If the target is small or moving, use a nearby landmark such as a branch, roofline, sign, or other obvious feature to recover it. Find that larger reference first, then move through the scene in a controlled direction until the target enters the field. A wider field of view can make this easier, but technique still matters even with a generous viewing area. The practical goal is not to sweep faster, but to reduce the number of times you lose orientation between naked-eye viewing and magnified viewing.

The Vortex GlassPak uses adjustable straps and includes a binocular case plus two tether straps. The pack weighs 8 ounces and measures 6.75 x 6.25 x 3.75 inches. Its close-at-hand carry position supports the section's target-acquisition routine by keeping binoculars accessible before they are raised into the existing line of sight.
Check on AmazonIf you click this link and buy, we earn a commission at no additional cost to you.
Hold the binoculars steadily and know when support helps
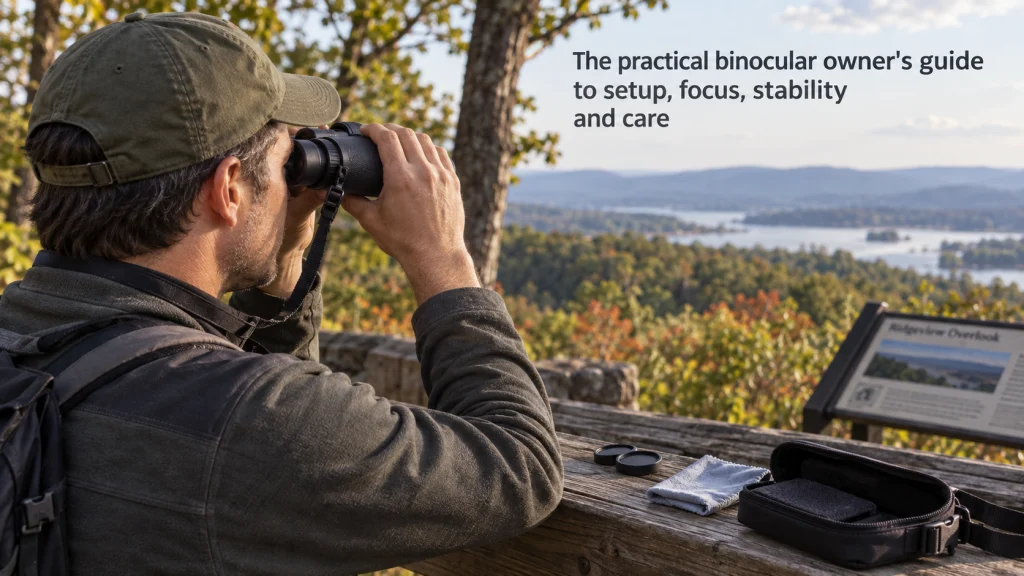
Handheld steadiness improves when the binoculars are supported by your body rather than held at arm’s length. Keep both hands on the instrument, let your elbows settle toward your torso, relax your shoulders, and avoid crushing the barrels with an unnecessarily tight grip. If a wall, railing, tree, bench, or other stable surface is available, use it to support your body or elbows. These changes reduce movement without requiring you to change the optical setup.
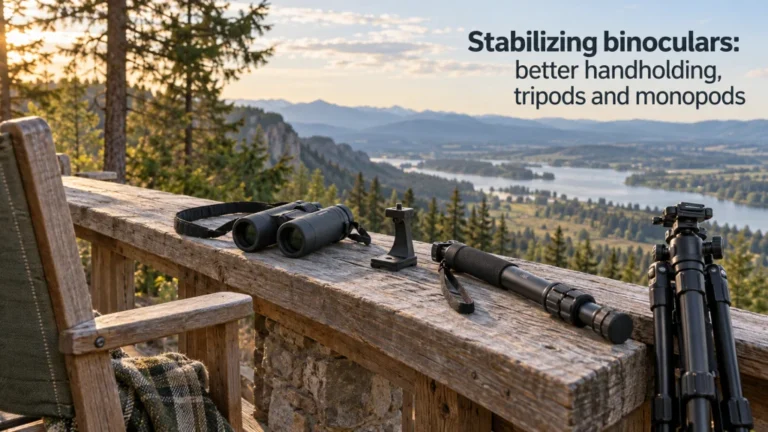
Higher magnification, longer viewing sessions, fatigue, wind, and heavier binoculars can make normal hand movement more obvious. If the view remains tiring after your fit and focus are correct, move to this guide on ways to stabilize binoculars for steadier viewing instead of repeatedly touching the diopter. A tripod or other support can help in the right situation, but attachment methods depend on the exact binocular and adapter interface, so compatibility should be verified rather than assumed. If you are deciding whether a support, strap, harness, or adapter belongs in your setup, the broader binocular accessories guide explains when extra gear solves a real use problem and when it only adds bulk.

This Bushnell adapter mounts most tripod-ready binoculars to tripods or window mounts. It uses a 1/4-20 interface and is intended for compatible full-size binoculars. It gives the stability section a direct support option while preserving the need to verify the binocular mounting socket first.
Check on AmazonIf you click this link and buy, we earn a commission at no additional cost to you.
Protect lenses without over-cleaning
Clean optics only when there is something worth removing. Loose dust or grit should be lifted or blown away with a method approved for the instrument before any wiping, because dragging hard particles across a coated lens is a worse outcome than leaving a harmless speck alone. Fingerprints, dried droplets, or stubborn residue may justify a proper lens-cleaning step, but household tissue, a shirt hem, and aggressive rubbing are poor substitutes for suitable materials. The exact cleaning method should follow the manufacturer’s instructions when coatings or sealing details differ.
Cleaning is easier when prevention does most of the work. Use the supplied caps when practical, keep fingers off exposed glass, and avoid setting the binoculars down where sand, grit, or spray can reach the lenses. For a fuller owner routine, use the binocular cleaning guide for lenses and exterior surfaces, which separates routine dust removal from situations that need more care. The important habit is restraint: clean enough to restore a clear usable surface, then stop rather than polishing the glass as a ritual after every short outing.

LensPen NLP-1 combines a retractable dust-removal brush with a non-liquid cleaning element. The round cleaning tip measures 12mm and the tool is 11cm long. It fits the section's dust-first cleaning sequence by providing a dedicated optics tool instead of household tissue or clothing.
Check on AmazonIf you click this link and buy, we earn a commission at no additional cost to you.
Dry and store binoculars for the conditions they actually see
Storage starts before the binoculars go back into a case. If they are wet from rain, mist, condensation, or a damp environment, dry the exterior and allow them to return to a dry condition in the way the manufacturer recommends before sealing them away. A case that protects against bumps can also trap moisture if the instrument is packed while damp. Sudden temperature changes can create condensation, so moving between very cold and warm environments deserves more patience than simply wiping the outer glass.
For routine storage, choose a clean, dry place away from excessive heat, prolonged humidity, and situations where the binoculars can be crushed or knocked from a shelf. Do not assume the word waterproof means the pair can be soaked, stored wet, or treated as maintenance-free. The detailed binocular storage guide covers moisture control, cases, caps, and longer periods between uses without turning storage into an elaborate project. The owner-level rule is straightforward: dry first, protect from shock, avoid heat and persistent moisture, and check the manual when the instrument has been exposed beyond ordinary use.

This pack contains 50 silica gel packets rated at 5 grams each. The listing describes them as rechargeable moisture absorbers for uses that include electronics and storage. They fit the storage section as a simple moisture-control accessory after the binoculars have already been dried properly.
Check on AmazonIf you click this link and buy, we earn a commission at no additional cost to you.
Troubleshoot by symptom before assuming damage
When the view is wrong, identify the symptom before deciding what caused it. Blur, blackouts, an incomplete field, double image, and internal fog do not all point to the same adjustment, and changing every control can hide the original problem. Start with the reversible owner checks you already know: eyecup position, interpupillary distance, focus, diopter, a clean exterior lens surface, and a stable viewing position. If the symptom survives those checks, stop escalating and compare it with the model manual or the broader binocular troubleshooting guide.
The table below is a routing tool, not a repair manual. It helps separate common setup mistakes from signs that deserve manufacturer support or qualified service. A successful owner check should make the next action clearer without opening the binocular body, adjusting internal prisms, or forcing mechanical parts. If you cannot explain the symptom with a normal external adjustment, treat uncertainty as a reason to stop rather than an invitation to experiment inside the instrument.
| Symptom | Check first | Useful owner action | Stop condition |
|---|---|---|---|
| One side looks soft | Focus and diopter calibration | Repeat the correct left and right eye setup for the focus system | One side remains soft after correct calibration and clean exterior lenses |
| Dark crescents or incomplete field | Eyecup height and interpupillary distance | Adjust eye position and barrel spacing in small steps | The field cannot be made usable without abnormal pressure or positioning |
| Image will not merge | Interpupillary distance and viewing position | Return to one comfortable circular field and retest | Persistent double image after normal fit checks |
| Fog appears inside | Recent temperature or moisture exposure | Follow the manual’s drying guidance without opening the body | Internal fog persists, returns repeatedly, or follows water ingress |
Use the first column to name what you actually see, then work across the row one step at a time. Do not skip ahead because two symptoms can feel similar while requiring different first checks. If the stop condition is reached, the useful decision is no longer another adjustment; it is service, warranty support, or model-specific guidance. That boundary keeps routine troubleshooting from turning into unqualified internal repair.
Blur or one soft side
If one side is sharp and the other is not, repeat the focus and diopter calibration before blaming the optics. Confirm that you are using the correct control for each eye and that the diopter is not being moved every time target distance changes. Check the exterior lens surfaces for obvious contamination, but do not start aggressive cleaning simply because the image is soft. If the same side remains soft after a correct setup, stop treating the symptom as a routine focus problem.
Blackouts or an incomplete field
Dark crescents, kidney-shaped shadows, or a field that disappears as you move slightly often point first to eye position, eyecup height, or interpupillary spacing. Change one variable at a time and keep your eyes centered behind the eyepieces instead of pressing harder. Eyeglasses can change the usable eye position, so the lowest eyecup setting is a common starting point, not a universal final answer. If no normal position produces a stable field, the physical fit between the binocular and the user may be the limiting factor.
Double image or internal fog
A persistent double image after normal interpupillary adjustment is not a reason to attempt internal alignment. Likewise, moisture or fog that is clearly inside the optical system should not be addressed by opening the housing or removing optical components. External condensation may clear as the instrument acclimates and dries according to its manual, but internal moisture that persists or returns deserves support. These are the moments when owner troubleshooting should hand the problem to qualified service.

This box contains 200 pre-moistened, single-use ZEISS lens wipes. The listing states that the wipes are suitable for lenses and anti-reflective coatings. They provide a controlled option for removing exterior smudges before a persistent soft image is treated as an optical or mechanical fault.
Check on AmazonIf you click this link and buy, we earn a commission at no additional cost to you.
Know when to stop and use service or warranty support
Owner-level troubleshooting ends when the problem points inside the binoculars or when a mechanical part is damaged. A broken hinge, loose internal component, severe or persistent double image, water ingress, damaged eyepiece or objective, and internal fog that does not clear are all reasons to stop. Forcing a focus mechanism, opening the body, or attempting internal collimation can turn a serviceable problem into a larger one. The manufacturer or a qualified repair provider should handle work the manual does not identify as user service.
Before contacting support, write down the symptom in plain language and note what normal checks you already completed. Include the exact model identification if available, because service instructions, warranty terms, sealing, replaceable parts, and user-accessible components can differ between models. Keep the explanation factual rather than diagnosing the internal cause yourself. A clear symptom report plus a known setup history gives support staff more useful information than a long list of guesses about what might have failed.

The Pelican 1300 with foam provides a 9.8 x 7 x 6.1-inch interior with cubed foam for equipment protection. Its hard case is waterproof and accepts a padlock. For service transport, compare the binocular's actual dimensions with the case interior before use rather than assuming universal fit.
Check on AmazonIf you click this link and buy, we earn a commission at no additional cost to you.
Final thoughts: a repeatable setup beats constant readjustment
Good binocular use is less about memorizing tricks and more about controlling variables in a sensible order. Fit the eyecups and interpupillary distance, calibrate the focus system correctly, bring the binoculars to a target you already see, and stabilize your body before deciding the optics are at fault. Clean only when needed, dry the instrument before storage, and treat the manual as the authority when your exact model departs from the common control layout. Once the baseline is right, most everyday viewing should involve normal focusing rather than constant recalibration.
The same discipline helps when something goes wrong. Start with the simplest external checks, change one thing at a time, and stop when the symptom points toward internal damage, persistent moisture, or a mechanical fault. That boundary protects both the binoculars and your time because not every problem is an owner-adjustment problem. One safety rule sits above every setup technique: never use ordinary binoculars to look directly at the sun.

The Vortex Vanquish 8x26 weighs 12.7 ounces and provides 15mm eye relief with a 352-foot field of view at 1,000 yards. It uses fully multi-coated optics in a compact waterproof and fogproof body. As a complete compact binocular, it reinforces the article's final point that a repeatable fit, focus, carry, and care routine matters more than constant readjustment.
Check on AmazonIf you click this link and buy, we earn a commission at no additional cost to you.
FAQs
🔭 What should I adjust first when using binoculars?
Start with eyecup height and interpupillary distance before fine-tuning focus. If your eye position and barrel spacing are wrong, focus adjustments can mask the real setup problem.
👓 Should eyecups be up or down if I wear glasses?
Eyeglass wearers usually start with the eyecups retracted or lowered so the eyes can get close enough to the eyepieces. Use the position that gives you the fullest stable field, because eyecup design and your glasses can change the best setting.
🎯 Why do I keep losing the target when I raise the binoculars?
Keep looking at the target with your naked eyes and raise the binoculars into that same line of sight. For small targets, use a nearby landmark as a reference instead of sweeping the magnified view randomly.
⚙️ Do I need to reset the diopter every time I focus?
Usually no. On a center-focus design, the diopter is a calibration setting for the difference between your eyes, while the main focus wheel handles normal distance changes.
🧍 Why do my binoculars look shaky even when the focus is correct?
Hand movement becomes more visible with higher magnification, longer sessions, fatigue, or heavier binoculars. Brace your elbows, relax your grip, use a stable surface when available, and consider verified support options if the problem persists.
💧 What should I do if my binoculars fog up inside?
Do not open the housing to dry internal optics. Follow the manufacturer’s drying guidance, and use service or warranty support if internal fog persists, returns, or follows water ingress.
References and Sources
- Nikon center-focus binocular instructions: supports the sequence for eyecups, interpupillary distance, diopter calibration, and normal center focusing.
- Nikon holding and tripod guidance: supports braced holding technique and the use of stable support for longer or higher-magnification viewing.
- Nikon binocular precautions: supports sun safety, moisture precautions, careful cleaning, storage, and the warning against forcing controls beyond their limits.
- Fujifilm binocular instructions: supports target acquisition, holding technique, and the distinction between focus and diopter adjustment.
- Leupold binocular troubleshooting: supports owner-level diopter checks and the handoff to service for damaged internal or integral parts.