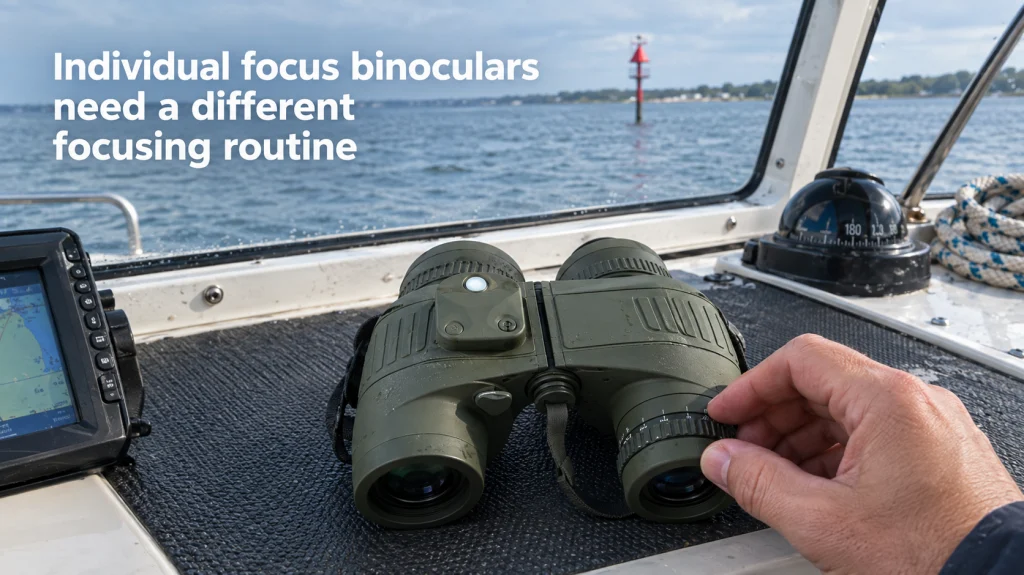
Individual focus binoculars use a separate focusing control for each eyepiece, so the familiar center wheel routine does not apply. The reliable setup is to establish eyecup position and interpupillary distance first, focus one optical channel on a clear target, focus the other on the same target, and then verify the combined view. If the viewing distance changes enough to soften the image, each eyepiece may need to be refocused independently. The exact ring direction, scale markings, and usable focus range can vary by model, so the owner’s instructions remain the final reference for a specific binocular.
Why the familiar center wheel routine does not apply
Learning how to focus individual focus binoculars starts with recognizing that nothing is missing just because there is no center focus wheel. On an individual focus design, each eyepiece has its own focusing control, so left and right focus are set separately. Nikon’s instructions for this architecture tell the user to focus the left eyepiece, then the right eyepiece, and to adjust both again when viewing a different object that requires a focus change. That is a different control routine from a center focus binocular, where the main wheel normally changes focus for both optical channels together.
This distinction matters because using the wrong routine can make a perfectly normal binocular feel awkward or defective. A center focus method assumes that one control moves both sides after a diopter has been calibrated, while an individual focus method gives each side its own working focus control. Individual focus does not mean autofocus, and it does not mean both eyepieces can be set once for every possible viewing distance. For the broader setup sequence around fit, eye position, and initial adjustment, see the binocular setup guide, while the complete guide to using binoculars covers the wider ownership routine beyond this focusing method.

Each eyepiece has its own ±5 diopter adjustment, matching an individual-focus setup rather than a shared center-wheel routine. The 10x50 optical system uses BAK4 prisms and FMC-coated lenses. The waterproof marine body also includes an illuminated compass and internal rangefinder.
Check on AmazonIf you click this link and buy, we earn a commission at no additional cost to you.
Confirm that the binocular is actually individual focus
Before changing anything, look at the control layout rather than relying on the product name, shape, or intended use. A true individual focus binocular normally has a focusing ring or rotating focusing eyepiece on both sides, and it does not use a center wheel to move both optical channels together. Fujifilm’s control diagrams make this distinction explicit by showing separate dioptric adjustment rings on its individual focus layout, while its center focus layout includes a central focus knob. Your own model may use different markings, but the functional question is the same: can each eyepiece be focused independently?
Do not assume that every binocular with a right side diopter is an individual focus model. Many center focus binoculars have one main focus wheel plus a separate diopter that compensates for the difference between the user’s eyes, which is a different system. If the center wheel changes the image sharpness in both barrels and only one eyepiece has a separate adjustment, use the standard binocular focusing procedure instead. If both eyepieces are active focus controls and there is no shared center focus mechanism, continue with the individual focus routine below.

The 7x50 model uses separate ±5 diopter controls for individual focus on the two eyepieces. BAK4 prisms and FMC-coated optics support a bright marine viewing setup. The IPX7 waterproof body also incorporates an illuminated compass and rangefinder for navigation.
Check on AmazonIf you click this link and buy, we earn a commission at no additional cost to you.
Set eyecups and interpupillary distance before focusing
Sharp focus is easier to judge when your eyes are positioned correctly behind the eyepieces, so start with fit rather than focus. Set the eyecups according to your model and whether you wear eyeglasses, then bring the binocular to your normal viewing position without pressing it hard into your face. Nikon and Fujifilm both place eyecup adjustment before focus in their use instructions because poor eye position can clip the field or create dark areas that have nothing to do with focus. If your model has unusual eyecups or a fixed eye position, follow its manual rather than assuming a generic setting.
Next, move the barrels at the hinge until the left and right fields merge into one comfortable circular view. This interpupillary distance setting should let both eyes sit naturally behind the exit pupils without forcing your face or head into an odd position. If you see two circles, persistent dark crescents, or an image that feels difficult to combine, correct the spacing before touching the focusing rings again. A clean fit check removes one source of confusion, which makes the next step about actual optical focus rather than eye placement.

The AOMEKIE 10x50 marine binoculars combine ten times magnification with 50mm objective lenses for boating, coastal observation, and other outdoor activities. A built in illuminated compass provides directional reference, while an eyepiece rangefinding reticle can help estimate distance or object size when the user applies the correct scale. This is an optical reticle, not an electronic laser rangefinder. The listing also describes waterproof construction and BAK4 prisms. Check compass visibility, focusing controls, and the marine handling features you need before selecting this alternative.
Check on AmazonIf you click this link and buy, we earn a commission at no additional cost to you.
Focus the first eyepiece without forcing accommodation
Choose a stationary target with enough fine detail to make sharpness easy to judge, and keep the binocular steady. Look through one eyepiece with the matching eye while gently closing the other eye, or block the unused optical channel without pressing on your face. Rotate that eyepiece’s focus control until the target appears as sharp as you can make it. The goal is not to race past the focus point and make your eye compensate for a soft image, but to find the setting that looks naturally crisp.
Oberwerk’s individual focus guidance specifically warns that the eyes can compensate for imperfect focus, which can make a broad range of ring positions seem acceptable. A useful way around that is to approach best focus deliberately, pass slightly through it, and return to the point where fine detail is most distinct without strain. Keep your eyelids relaxed when isolating one eye so you are not changing the viewing condition by squeezing hard. Once the first side looks clean, leave its ring alone while you set the second eyepiece on the same target.

Two separate ±5 diopter rings let each eyepiece be focused for its matching eye. The 7x50 optical system uses BAK4 Porro prisms and FMC-coated lenses. Fold-down eyecups and adjustable interpupillary distance help establish a stable viewing position before fine focus.
Check on AmazonIf you click this link and buy, we earn a commission at no additional cost to you.
Focus the second eyepiece on the same target
Switch eyes without changing the target or moving to a different part of the scene. Keep the first eyepiece setting where it is, look through the second eyepiece with the corresponding eye, and rotate only that side’s focus control until the same detail becomes sharp. Using the same target matters because it keeps viewing distance constant while you match the two optical channels. Nikon’s IF procedure follows this left side then right side sequence for exactly that reason.
Do not try to make the numeric markings on the two eyepieces match unless the owner’s instructions specifically tell you to do so. The useful result is matched visual focus at the target distance, not identical scale positions, because the two eyes may require different settings. Likewise, do not copy a setting from another person or treat a zero mark as automatically correct for you. When both sides are independently sharp on the same target, the next check is whether the combined binocular view remains comfortable and clear.
Check the combined image before moving on
Open both eyes and view the same target without touching either focus ring at first. The image should look sharp without an obvious sense that one side is carrying the view while the other side feels soft. If something seems wrong, repeat the single eye check rather than making random changes with both eyes open. Working one optical channel at a time keeps the adjustment understandable and prevents one eye from masking an error on the other side.
Also separate focus problems from alignment or fit problems. If each eye sees a sharp image by itself but the combined view is doubled, severely uncomfortable, or impossible to merge after interpupillary distance is set correctly, more focusing is not the right fix. Stop using the binocular if the image remains severely doubled, if an eyepiece appears damaged, or if there are signs of internal damage or water ingress, and use the manufacturer’s service route rather than attempting internal adjustment. Individual focus rings are owner controls, but prism alignment and internal optical repair are not.
What changes when the subject distance changes
Once both eyepieces are matched for one target distance, the binocular can feel settled as long as the next subjects fall within a range that still looks acceptably sharp. Move to a sufficiently different distance, however, and the image may soften enough that both eyepieces need attention again. Fujifilm’s individual focus instructions state that objects at different distances require each eye’s focus to be adjusted independently. That repeated two-eyepiece adjustment is normal behavior for the architecture, not evidence that the binocular failed to hold a setting.
The practical cost is speed, because changing distance can require two controls instead of one shared wheel. The practical benefit is that each side remains directly adjustable, which can work well when the viewing task spends long stretches around a similar distance. Treat this as a use pattern rather than a universal advantage, since a subject that moves quickly between near and far distances can make individual focus less convenient. The table below is a simple ownership check for deciding whether you actually need to refocus.
| Viewing situation | What to check | Likely action |
|---|---|---|
| Subject stays around the same distance | Combined image remains naturally sharp | Leave both eyepieces alone |
| Subject moves to a clearly different distance | Fine detail becomes soft in one or both eyes | Refocus each eyepiece independently |
| One side looks sharp and the other does not | Check each eye separately on the same target | Correct only the soft side, then verify both eyes together |
| Both sides are sharp alone but the view will not merge | Recheck interpupillary distance and physical condition | Do not chase the problem with focus alone |
Use the table as a diagnostic sequence, not as a promise that every model behaves identically. Depth of field, magnification, your eyes, and the exact optical design affect how much distance change you can tolerate before refocusing feels necessary. The cleanest rule is to leave the rings alone while the view remains comfortably sharp and to refocus both optical channels when distance change makes that sharpness fall away. This avoids needless adjustment without pretending that individual focus somehow tracks distance automatically.
Why infinity-focused use can feel different
Individual focus binoculars can feel unusually simple when most of the viewing is concentrated on very distant subjects. After each eyepiece is focused for a distant target, other sufficiently distant subjects may remain acceptably sharp without constant ring movement. That experience is one reason some owners describe the binocular as if it barely needs focusing. The description becomes misleading when it is shortened into the claim that individual focus is autofocus.
The distinction becomes obvious as soon as you bring the viewing task closer or shift between substantially different distances. If a nearer target falls outside the range that still appears sharp, each eyepiece must be focused again for that distance. Do not assume that a distant setting is correct for every subject just because it works across a broad far range in your own viewing. Think of infinity-focused use as a stable distance condition, not as a different focusing mechanism.
When stiff or ineffective eyepiece focus needs service
An individual focus ring should be treated as an external adjustment, not an invitation to force or dismantle the eyepiece. If a ring will not move through the range described by the manual, feels mechanically wrong, turns without changing focus, or cannot bring a clear target into focus, stop adding force. First confirm that you are using the correct control, that the eyecup is not being mistaken for the focusing ring, and that the target distance is within the model’s intended focus range. If those basic checks do not resolve the problem, use the manufacturer’s support or service instructions.
The same boundary applies when the problem is more than focus. Severe double vision, a visibly loose optical component, water inside the binocular, a damaged hinge, or impact damage should not be treated as a focusing exercise. Internal collimation, prism adjustment, and eyepiece disassembly belong with qualified service, because changing them can create a larger optical problem than the one you started with. A useful owner rule is simple: adjust the controls the manual identifies for the user, and stop when the symptom points beyond those controls.
- Verify that both eyepieces are actual focus controls on your model.
- Recheck eyecup position and interpupillary distance before blaming focus.
- Test each optical channel separately on the same detailed target.
- Do not force a ring that feels seized, damaged, or mechanically abnormal.
- Use qualified service for internal alignment, water ingress, or damaged optical parts.
This sequence keeps troubleshooting at the owner level and prevents a focus problem from turning into an internal repair attempt. If the binocular responds normally to both eyepiece controls, return to the basic left side, right side, combined view routine. If it does not respond normally, the manual and service path are more useful than another round of increasingly aggressive adjustment. The focusing procedure ends where the owner accessible controls stop.
Final Thoughts: treat each eyepiece as its own focus control
The easiest way to make individual focus binoculars feel predictable is to stop borrowing the center focus routine from a different control architecture. Set eyecups and interpupillary distance first, focus one side on a detailed target, focus the second side on the same target, then verify the combined image. If a meaningful distance change softens the view, repeat the independent focus adjustment rather than searching for a shared control that is not there. Once that sequence becomes familiar, the binocular’s behavior is much easier to interpret.
Keep the model manual close when ring markings, focus limits, or eyecup design differ from the generic examples here. Do not treat individual focus as autofocus, do not assume one distant setting covers every viewing distance, and do not force a control that is not behaving normally. The correct routine is simple because each eyepiece has one job, but it only works when fit, distance, and mechanical condition are also right. That is the point where a different focus architecture stops feeling unfamiliar and starts feeling logical.
Frequently asked questions
🔭 Do individual focus binoculars have a center focus wheel?
A true individual focus design focuses the left and right eyepieces separately rather than using one center wheel for both channels. Check the exact control layout in your manual because binocular families can use different focusing systems.
👁️ Should both eyepiece scales end up on the same number?
Not necessarily. Match visual sharpness for each eye on the same target instead of forcing both rings to the same marking unless your model’s instructions specifically require that.
🌲 Do I need to refocus both eyepieces for a different distance?
If the new distance makes the image noticeably soft, refocus each eyepiece independently. If the view remains naturally sharp, leave the controls alone until a focus change is actually needed.
🧭 Are individual focus binoculars autofocus?
No. They may need little adjustment when viewing subjects within a similar distant range, but a substantial distance change can require both eyepieces to be focused again.
🛠️ What should I do if one focusing ring will not bring the image into focus?
Confirm that you are using the correct control and that fit and target distance are reasonable for the model. If the ring is stiff, ineffective, damaged, or the binocular also shows severe double vision or internal damage, stop forcing it and follow the manufacturer’s service guidance.
References and Sources
- Nikon individual focus binocular instructions: Supports the eyecup, interpupillary distance, separate left and right focusing sequence, and the need to refocus both sides when viewing a different object.
- Fujifilm binocular instructions: Supports the distinction between center focus and individual focus control layouts, plus the setup order for eyecups, interpupillary distance, and focusing.
- Oberwerk individual focus guidance: Supports isolating one eye at a time and avoiding a focus judgment that is masked by the eyes compensating for a soft image.