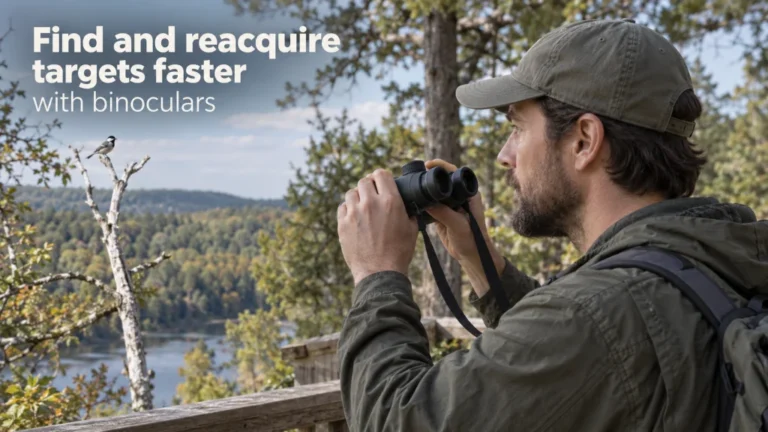
A binocular neck strap is only secure when both sides follow the attachment path intended for that binocular and strap, the webbing is flat, and the buckle return path is fully seated. The safest starting point is the supplied strap, the binocular’s own strap lugs, and the exact manual or manufacturer diagram when the hardware differs from a simple webbing buckle. After threading both sides, set a usable length and test the attachment over a soft surface before carrying the binocular normally. Do not assume that a knot, metal ring, clip, harness tether, or quick-release connector uses the same load path as the supplied neck strap.
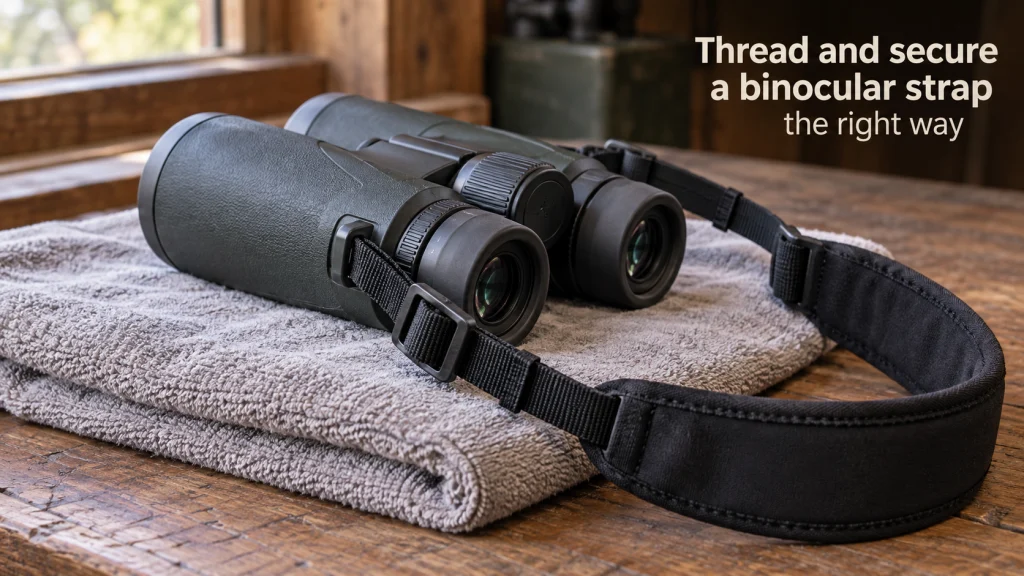
Treat the strap as part of the binocular’s safety system
Learning how to attach a binocular strap correctly is a small setup job with an expensive consequence if it is done badly. A premium binocular can still hit the floor if one loose tail slips through a buckle or one side is routed through the wrong opening. Before adjusting focus or heading outside, make the strap attachment part of your basic binocular setup checks. If you are new to the controls as well as the strap, the broader guide to using binoculars correctly explains the other adjustments that should be set before normal viewing.
The important boundary is that strap hardware is not completely standardized. Vortex documents a common three-step path in which the webbing passes through the binocular attachment loop, returns through the buckle, and is pulled tight, while ZEISS manuals show their own carrying-strap eyelets and model-specific routing around supplied protective covers. That is enough to establish a useful method, but not enough to claim that every binocular uses the same buckle, keeper, clip, or accessory path. When your supplied strap does not match the simple webbing-and-buckle layout described here, stop and use the exact instructions for that binocular or strap system rather than improvising.

This neoprene neck or shoulder strap is designed for small binoculars and uses two 1.5mm Mini Quick Disconnect loop connections. OP/TECH rates its recommended comfort load at up to 2.5 pounds. The strap adjusts from 31.5 to 38 inches and has two connection points.
Check on AmazonIf you click this link and buy, we earn a commission at no additional cost to you.
Identify the strap lugs and the supplied buckle path first
Start with the binocular on a table or other stable surface and find the two intended strap attachment points, normally one on each side of the body. They may be molded loops, recessed eyelets, or another manufacturer-defined attachment interface, so appearance alone is not enough to prove how a connector should be used. Lay out the supplied strap without feeding anything through the lugs yet, then identify the padded center section, the two webbing tails, the adjustment buckles, and any keepers that are already fitted. If a rainguard or eyepiece cap is designed to ride on the strap, check the manual before deciding whether that part belongs on one side, both sides, or somewhere else in the routing.
Use the table as a pre-threading check rather than as a universal parts diagram. The goal is to know which parts carry the binocular’s weight and which parts merely retain a loose tail or a protective cap. A buckle should not be treated as decorative hardware, because its job is to keep the return path from backing out under load. If your strap includes clips, cords, proprietary tabs, or a quick-release fitting instead of plain webbing, the correct next step is the exact system instruction, not a guessed adaptation of this method.
| Part to check | What to confirm | Why it matters |
|---|---|---|
| Left and right strap lugs | They are the intended attachment points named or shown by the manufacturer | The binocular’s weight should be carried through the designed interface |
| Webbing tail | It is long enough to pass through the lug and complete the documented return path | A short or partly threaded tail can work loose |
| Adjustment buckle | The webbing follows the same slots and direction shown in the supplied instructions | The buckle only grips correctly when the return path is correct |
| Protective cap or rainguard loop | Its place in the strap path is documented for the exact setup | Accessory routing can differ between binocular designs |
Once those roles are clear, the threading itself becomes much easier to inspect. You are no longer trying to remember a generic knot or copy an online photo that may show different hardware. You are following a known load path and checking each part as it takes its intended position. That same approach also makes it easier to catch a twist before the strap is tightened.

This Vortex accessory is a binocular rainguard. Amazon lists it for mid- and full-size Vortex binoculars. The listing specifically excludes Kaibab HD models from that fit statement.
Check on AmazonIf you click this link and buy, we earn a commission at no additional cost to you.
Thread one side without twisting the webbing
For a simple supplied strap that uses flat webbing and a sliding buckle, begin with one side only. Follow the direction shown by the manufacturer, feeding enough of the loose end through the strap lug to reach the buckle without pulling the padded center section out of position. Vortex’s documented example sends the strap end up through the attachment loop before the webbing is returned through the buckle, but that direction should be copied only when your hardware matches the documented arrangement. Keep the webbing flat against itself as it passes through the lug, because a half twist makes the strap sit awkwardly and can hide whether the return path is seated properly.
Do not rush to tighten the first side as soon as the tail appears through the lug. Pause and trace the webbing with a finger from the padded strap toward the binocular, through the attachment point, and back toward the buckle. The broad faces of the webbing should stay aligned rather than flipping over between the buckle and lug. If the strap carries an eyepiece cap or rainguard on that side, confirm that the accessory can move as intended without trapping the webbing in a twist. Once the path is visibly flat, you can lock the return through the buckle instead of tightening a mistake into place.

This neoprene neck strap uses 3/8-inch nylon webbing and two connection points for cameras and binoculars. Its length adjusts from 22 to 44 inches, and it does not use Quick Disconnect hardware. OP/TECH also lists it as compatible with most binocular rainguards.
Check on AmazonIf you click this link and buy, we earn a commission at no additional cost to you.
Lock the return path through the buckle
The return path is what turns a loose loop through the binocular lug into a load-bearing attachment. On the common buckle arrangement documented by Vortex, the loose end is threaded back through the buckle and then pulled tight so the webbing is secure within it. Your buckle may have a slightly different number of slots, a separate keeper, or a factory-folded path, so compare the loose side with any pre-threaded example before assuming where the tail goes. The finished path should look deliberate, with the webbing lying flat and the tail captured rather than simply hanging through one opening.
Leave enough tail beyond the buckle that normal length adjustment cannot immediately pull the end free. There is no useful universal inch measurement here because buckle size, webbing thickness, strap design, and manufacturer instructions vary. What matters is that the return path is complete and remains captured when the strap is tensioned by hand. Do not tie an extra knot, cut the webbing, melt the end, sew it, or add hardware unless the manufacturer specifically documents that modification, because a homemade fix can interfere with the intended buckle behavior and make later inspection harder.

These soft hook-and-loop wraps are designed to lock OP/TECH standard Quick Disconnect buckles against accidental unfastening. Each piece measures 4.5 by 0.75 inches, and the pack contains four pieces. OP/TECH specifies that Secure-Its fit standard Quick Disconnects and are not compatible with Mini QD connectors.
Check on AmazonIf you click this link and buy, we earn a commission at no additional cost to you.
Repeat the path and equalize both sides
Once the first side is correct, thread the second side in the same documented sequence. Compare the two attachments side by side before changing the carrying length, looking for matching buckle orientation, flat webbing, and a similar amount of captured tail. The binocular should hang level enough that one attachment is not obviously taking a different path or sitting under a twist. A small visual difference in tail length is not automatically a problem, but a different buckle route is a reason to stop and recheck the instructions.
Then adjust the overall strap length for the way you actually plan to carry the binocular. The body should be reachable without forcing the strap tight against your neck, but it should not hang so low that it swings freely into a railing, table edge, or other hard surface every time you move. Make length changes through the intended adjustment buckles rather than by pulling on the lug itself. After the length feels sensible, recheck both return paths because sliding the strap for fit can expose a tail that was only marginally captured.

This neoprene strap uses the Uni-Loop connection system with two connection points and Quick Disconnect hardware. OP/TECH lists the Uni-Loop version as adjustable from 36 to 43 inches. The Super Classic line is designed for heavy cameras or binoculars and uses a non-skid backing.
Check on AmazonIf you click this link and buy, we earn a commission at no additional cost to you.
Perform a controlled pull test over a soft surface
Do not make the first test by putting the strap around your neck and walking away. Place the binocular a few inches above a bed, padded bench, folded towel, or another soft surface where a slip will not turn into an impact. Hold the strap near its center and apply steady upward tension while watching both lugs and both buckles. The purpose is not to yank on the binocular, but to confirm that the webbing stays captured and that neither tail begins creeping back through its buckle.
Repeat the inspection with the binocular supported in one hand while you tension each side separately. This isolates a weak attachment that can be hidden when both sides share the load. If anything moves, twists, opens, or looks different after tension is applied, set the binocular down and correct the routing before normal use. A secure setup should pass the following simple checks without relying on a knot or improvised backup.
- Both strap ends follow the intended manufacturer path.
- The webbing lies flat through each lug and buckle.
- Each loose tail remains captured when steady tension is applied.
- The left and right attachments carry load without obvious slipping.
- The chosen strap length does not pull either buckle into an awkward angle.
After the test, put the binocular down once more and look at the attachment points closely. The final visual check matters because tension can reveal a reversed buckle path or a tail that was only resting in place. If the strap remains stable, you can carry the binocular normally while still making the lugs and buckles part of an occasional owner check. If a lug itself is cracked, deformed, loose, or damaged, stop using the strap and follow the manufacturer’s service guidance rather than testing it harder.

This four-pack contains 27 by 54 inch bath towels made from 100% ring-spun cotton. The listing describes the grey towels as highly absorbent with a soft feel. They are machine washable for repeated use.
Check on AmazonIf you click this link and buy, we earn a commission at no additional cost to you.
Direct metal rings can be a problem on some binoculars
A metal split ring or clip may look stronger than webbing, but stronger hardware is not automatically safer for the binocular’s attachment point. Vortex explicitly warns against threading metal rings directly onto its binocular strap attachments and says that direct metal hardware can damage those attachment points. That warning is specific evidence for Vortex’s design, not proof that every manufacturer uses the same material or prohibition. The practical lesson is to treat the lug and connector as a matched interface and verify the allowed connection method before substituting hardware.
This is also why a loose neck strap should not be upgraded with random key rings, carabiners, or clips simply because they fit through the opening. A hard connector can concentrate load or rub differently from the soft webbing the lug was designed around, and the risk is difficult to judge from appearance alone. If the manufacturer provides a documented adapter, tether, ring, or protective interface for a particular system, use that method as specified. If there is no documentation for the hardware you want to add, the safer owner-level choice is to keep the supplied attachment arrangement rather than invent a stronger-looking one.

These system connectors use a 1.5mm nylon cord loop for tight connection points and 3/8-inch Mini Quick Disconnect hardware. The set contains four connectors, and OP/TECH lists a recommended comfort load up to 2.5 pounds. OP/TECH also warns that sharp lug edges can damage the cord.
Check on AmazonIf you click this link and buy, we earn a commission at no additional cost to you.
Harness and quick-release systems need their own instructions
A binocular harness, detachable tether, or quick-release strap can change the attachment interface completely. Some systems use short webbing loops at the binocular, some use proprietary clips, and others add a separate connector between the body and the carrying system. Those parts should not be threaded by analogy with a basic neck strap, even if the final goal is still to support the binocular from both sides. Compatibility depends on the exact binocular attachment point and the exact carrying system, so the system manual is the correct source for the load path.
Keep this distinction clear when replacing a supplied strap later. The steps in this article are for attaching and checking the intended neck-strap arrangement, not for choosing a different carrying system or adapting an unknown harness. If the new system replaces the factory webbing, verify how its tethers attach, what hardware is allowed at the lugs, and how any release mechanism is locked before letting the binocular hang from it. A quick release is only useful after its attachment method is confirmed, and convenience is not a substitute for a secure, documented connection.

This non-stretch webbing harness is designed for cameras and binoculars and uses two Uni-Loop connection points. Its self-adjusting design is fully adjustable and includes Quick Disconnect hardware. OP/TECH lists it as fitting most binoculars with a recommended comfort load up to 15 pounds.
Check on AmazonIf you click this link and buy, we earn a commission at no additional cost to you.
Final Thoughts: copy the intended load path, not a generic knot
The safest way to put a strap on binoculars is to begin with the exact lugs, strap, buckle, and routing the manufacturer intended. Thread one side flat, complete the buckle return path, repeat the same verified sequence on the other side, adjust the length, and perform a controlled pull test over a soft surface. Treat unfamiliar clips, rings, harness tethers, and quick-release parts as different systems that need their own instructions. Once the strap is secure, the next useful skill is learning how to find objects with binoculars efficiently without fighting the view every time you raise them.
Make the attachment points part of a quick visual check whenever the strap has been removed, readjusted, or snagged during storage. Look for a tail creeping through a buckle, webbing folded against a lug, or visible damage at the attachment point before trusting the strap with the binocular’s full weight. If the hardware no longer matches the documented setup or the lug itself appears damaged, stop carrying the binocular by that strap until the correct next step is confirmed. A few seconds spent checking the load path is a better safeguard than adding an improvised knot after something has already started to slip.

The GlassPak P400 carries a full range of full-size binoculars in a full-coverage case with adjustable harness straps. It includes the harness strap, binocular case, and two tether straps, plus mesh side pockets and a zippered rear pocket. Vortex lists the pack at 8 ounces and 6.75 by 6.25 by 3.75 inches.
Check on AmazonIf you click this link and buy, we earn a commission at no additional cost to you.
FAQs
🔭 How do I know which hole in the buckle the strap should use?
Use the path shown by the supplied strap instructions or the exact binocular manual. Buckle slot count and return routing can differ, so do not copy a different brand or strap just because the hardware looks similar.
🧵 Should the binocular strap be threaded the same way on both sides?
Usually the two sides mirror the same intended load path, but protective caps or other supplied parts can affect the routing. Compare both sides with the manufacturer diagram before assuming they should look identical in every detail.
🎒 How tight should a binocular neck strap be?
Set it long enough to raise the binocular comfortably without pulling against your neck, but not so long that the body swings freely into hard objects. Recheck both buckles after changing the length because adjustment can reduce the amount of tail captured by the buckle.
🔩 Can I attach a metal ring directly to the strap lug?
Only if the exact manufacturer documentation allows that connection. Vortex specifically warns against direct metal rings on its binocular strap attachments, which is a good reason not to assume metal hardware is safe for an unknown lug design.
🪢 Should I tie a knot in the loose strap end for extra security?
Not unless the manufacturer instructs you to do so. A properly routed buckle should secure the webbing through its intended return path, while an added knot can hide incorrect threading or interfere with adjustment.
🧩 Is a harness attached the same way as the supplied neck strap?
Not necessarily. Harnesses and quick-release systems may use different tethers, clips, or adapters, so verify the exact harness instructions and binocular interface before carrying the binocular by that system.
References and Sources
- Vortex binocular FAQ: Documents the three-step neck-strap threading path for its binocular attachment loop and buckle, plus its warning against direct metal rings on the strap attachment.
- ZEISS TERRA ED instructions for use: Identifies the carrying strap eyelets and shows that strap routing can also involve model-specific protective-cover placement.