A binocular harness is useful only when its carry architecture matches the binocular, the user’s body, and the rest of the gear being worn. Open strap systems emphasize fast access and low bulk, enclosed chest packs add protection and storage, and a conventional strap can still be the cleaner answer for lighter setups. The deciding checks are load path, access, binocular dimensions, connector compatibility, torso fit, clothing interaction, and whether the system creates a new problem while solving an old one. Choose the carry family first, then verify the exact fit before buying.
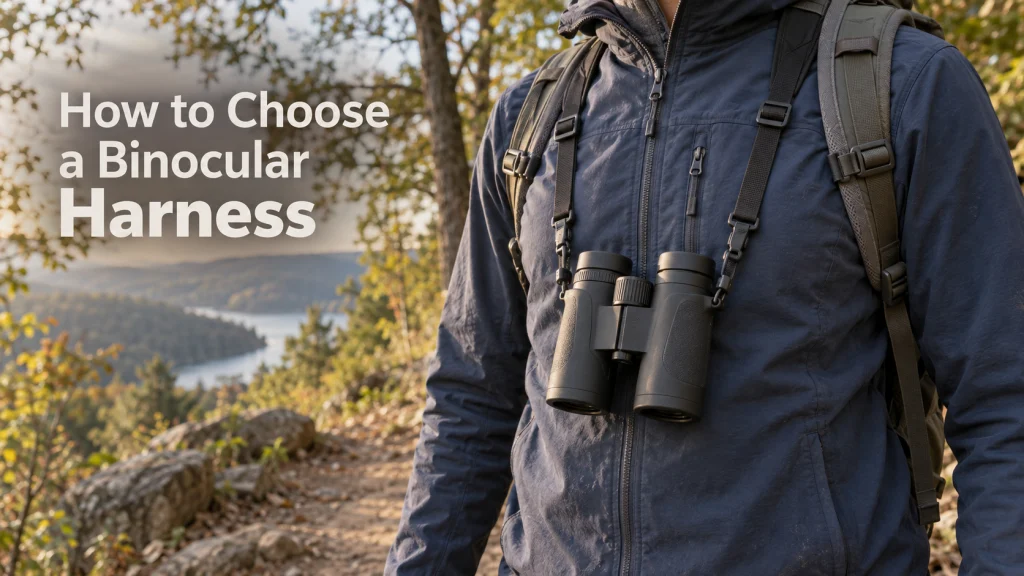
Start with load, access, and what is already on your torso
Before choosing a binocular harness, picture the binocular during a long outing: where does its weight sit, how often do you raise it, and what else crosses your shoulders or chest? A carry system that feels tidy while standing indoors can become awkward once a backpack strap, jacket collar, camera sling, or hydration tube enters the same space. The first decision is therefore not which harness looks most padded or most elaborate. It is which carry architecture interferes least with the way you actually use the binocular.
This also keeps a simple accessory purchase from turning into an unnecessary equipment stack. If the binocular is light, used briefly, and already behaves well on a strap, a more complex system may add more buckles and routing than value. If you are still working out the broader setup, the binocular accessories that affect carrying, protection, and fit provide the wider decision context. Once the carry problem is clear, the next step is choosing between an open harness, an enclosed chest pack, and a conventional strap.

This adjustable Vortex harness uses nylon and Lycra straps to spread an optic load across the shoulders. It is designed to carry binoculars, rangefinders, or cameras close to the chest while walking. The one-size strap system lets the binocular slide upward into viewing position without an enclosed pouch.
Check on AmazonIf you click this link and buy, we earn a commission at no additional cost to you.
Choose the carry architecture before the harness model
The useful distinction is how the system manages the binocular, not how many features appear on the product page. An open harness suspends the binocular from straps and leaves the optic exposed, while an enclosed chest pack places it inside a fitted compartment. A conventional neck or shoulder strap keeps the layout simpler and can be easier to hand to someone else or remove quickly. None of these layouts is automatically better because access, protection, bulk, and interference pull in different directions.
Start by ranking what matters most during actual viewing: fastest possible access, less movement while walking, protection from brush or weather, minimal torso coverage, or simple removal. Do not assume a system that spreads load across more of the upper body will automatically feel better on every person. Fit, strap angle, clothing, chest shape, and the position of other gear can change the result substantially. The right architecture is the one that solves your main carry problem without creating a more persistent one.
Open harness strap
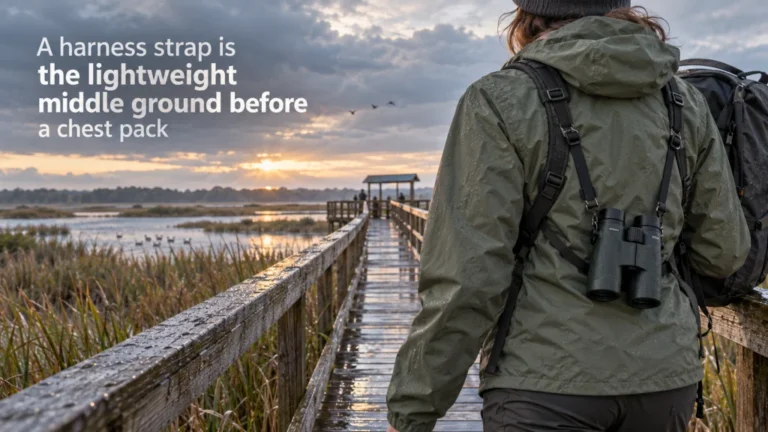
An open binocular harness strap keeps the optic outside a pouch and usually prioritizes quick reach with less material across the front of the body. That can work well when the binocular moves frequently between the resting position and the eyes. The tradeoff is that the optic remains more exposed and strap tension becomes part of the fit, especially when walking quickly or bending. Treat claims about bounce or comfort as system dependent, because body shape, binocular weight, adjustment, and movement all affect the result.
Enclosed chest pack
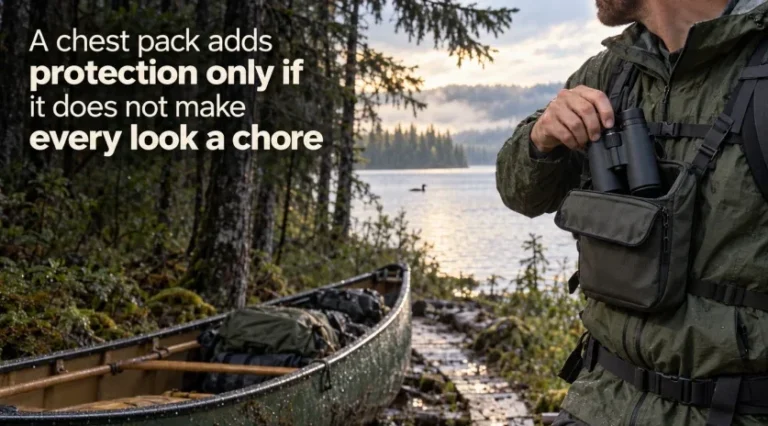
A binocular chest pack adds a physical compartment around the binocular, which can improve protection and create storage for small related items. That protection also introduces another fit problem because the compartment has to match the binocular’s real length, width, and depth while still closing normally. A larger pack is not automatically safer if the binocular shifts excessively inside it, and a tight pack is not useful if the eyecups or hinge position prevent clean access. Choose this architecture when protection and controlled storage matter enough to justify the added bulk on the torso.
Conventional neck or shoulder strap
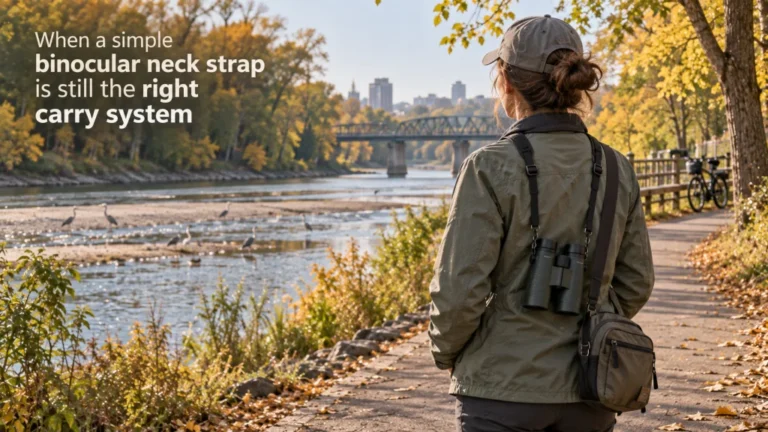
A binocular neck strap remains a reasonable baseline when simplicity matters more than load distribution across multiple straps. It is easy to remove, easy to lend with the binocular, and usually creates fewer routing conflicts with clothing or packs. A longer strap may also be worn across the body in some setups, depending on its length, attachment method, and the user’s movement. The drawback is concentrated load and more swing in some positions, so the simple option still needs to match the binocular and the way it is carried.

The Vortex GlassPak uses a full-coverage lid and an enclosed case measuring 6.75 by 6.25 by 3.75 inches. It includes the harness strap, binocular case, and two binocular tether straps. Two side mesh pockets and a rear zip pocket add storage while the enclosure keeps the optic contained on the chest.
Check on AmazonIf you click this link and buy, we earn a commission at no additional cost to you.
Match the carry system to the binocular
Once the carry architecture is chosen, stop thinking of the binocular as a generic 8×42 or 10×42 label. Two binoculars with the same optical format can differ enough in body length, width, hinge shape, strap lugs, eyecup position, and weight to behave differently in the same carrying system. Enclosed systems add compartment clearance to that list, while open systems make connector routing and balance more important. Compatibility should be checked against the exact binocular rather than inferred from magnification and objective size alone.
The same principle applies to published fit charts and manufacturer compatibility tables. A useful chart tells you what dimension or attachment feature is being matched, not just that a binocular belongs to a familiar size class. Some enclosure sizing references use usable internal dimensions, and measurement conventions can differ depending on eyecup position. Verify how the measurement was taken before assuming your own number means the same thing.
Weight and dimensions
Weight matters because it changes how much tension and movement the carrying system must control, but dimensions decide whether the binocular physically fits where it is supposed to sit. For a pouch, check length, width, and depth rather than relying on a label such as small or medium. For an open harness, look at how the binocular hangs from its attachment points and whether it rests at a useful height without excessive slack. If the binocular has extended eyecups or a bulky hinge, measure it in the configuration you actually use instead of the smallest possible configuration.
Connector style
Connector compatibility deserves its own check because not every system attaches in the same way. Binoculars may use strap slots, lugs, loops, rings, or manufacturer specific connector hardware, while carry systems may terminate in webbing, clips, quick disconnects, or proprietary adapters. A connector that can be forced through a slot is not the same as a connector designed to move freely and stay secure there. Confirm the exact interface, connector width, and any required adapter before treating a carry system as interchangeable.
Access frequency
The more often the binocular goes to your eyes, the more small access delays matter. An exposed optic is usually simpler to grab, while an enclosure adds a lid, flap, retention step, or hand movement that may or may not bother you. On the other hand, a protected binocular can be easier to carry confidently through brush, crowded transit, or messy weather when immediate access is less important. Match the access pattern to the outing instead of assuming maximum retention and maximum speed can always occupy the same design.
| Fit check | What to verify | Why it changes the decision |
|---|---|---|
| Binocular size | Length, width, depth, and eyecup position | Determines enclosure clearance and resting position |
| Binocular weight | Published weight for the exact configuration | Affects strap tension, movement, and how load feels |
| Attachment points | Slot, lug, loop, ring, or dedicated connector | Determines whether the carry system can attach correctly |
| Access pattern | Frequent viewing or longer periods between use | Changes how much enclosure and retention are worth |
A fit table is useful only if its entries reflect the exact binocular and the way you intend to carry it. If one item remains uncertain, verify that item before buying rather than assuming the rest of the checklist compensates for it. This is especially important with proprietary connectors and fitted chest compartments. Compatibility is a physical relationship, not a marketing category.

This OUFABE harness uses an adjustable X-shaped strap layout for binoculars, cameras, and rangefinders. Its nylon construction leaves the optic exposed rather than placing it inside a fitted compartment. The strap length can be adjusted so the resting height and tension can be changed for the carried optic.
Check on AmazonIf you click this link and buy, we earn a commission at no additional cost to you.
Check body and clothing interaction after binocular fit passes
A harness can fit the binocular correctly and still fit the person poorly. Strap angle changes across different torso shapes, and the same adjustment can sit differently over a light shirt, insulated jacket, rain shell, or backpack shoulder straps. Chest packs also occupy a fixed area on the front of the body, so pocket access, zippers, ventilation, and other straps can become part of the decision. This is why torso fit should be tested after binocular compatibility, not treated as a substitute for it.
Try the full clothing and gear combination you expect to use, then raise and lower the binocular several times while walking, turning, and bending normally. Watch for straps that migrate toward the neck, buckles that land under pack straps, connectors that twist, or a pouch that blocks a jacket zipper. If the adjustment only works with one thin layer, check whether there is enough range for seasonal clothing. A carry system earns its place when it remains predictable across the conditions you actually plan to wear it in.
- Check shoulder straps and backpack straps for overlap or pressure points.
- Confirm that jacket zippers and chest pockets remain usable.
- Raise the binocular without pulling another strap out of place.
- Verify that excess webbing can be managed without dangling into the binocular.
- Repeat the fit check with the thickest clothing you expect to wear.
Do not treat this checklist as a medical comfort test or a guarantee that a harness will remove every source of strain. It is a practical interference test that shows whether the geometry of the system works on your body. If the harness solves one carry problem but repeatedly collides with other gear, the architecture is wrong for that setup. That is useful information before you spend more time adjusting it.

This Rick Young Outdoors harness uses shock cord and weighs 2.24 ounces. The black one-size design can be adjusted into five carrying positions for different field setups. It is made in the USA and uses a swivel-hook fastener for the binocular connection.
Check on AmazonIf you click this link and buy, we earn a commission at no additional cost to you.
Decide whether quick release solves a real workflow problem
Quick release hardware is useful when the binocular genuinely needs to move between carrying systems, a case, storage, or another user with minimal rethreading. It is less valuable when the binocular stays attached to the same system for nearly every outing. Extra clips can simplify one transition while adding another connection point that must fit the binocular correctly. The useful question is not whether quick release sounds convenient, but how often you actually need to detach the optic.
If frequent removal is part of the workflow, compare the connector on the binocular side with the connector on the carry side and make sure the parts are intended to work together. The quick release binocular strap decision is mainly about attachment method, swap frequency, and whether the extra hardware stays out of the way during viewing. Do not improvise load bearing connections from pieces that merely appear to clip together. A clean, compatible connection is more important than saving a few seconds during an occasional change.

This TIMISM nylon strap adjusts from 39.4 to 63 inches and includes a padded shoulder section. The selected variant includes both thin and thick quick-release connectors for different attachment interfaces. The connector sets detach without rethreading the entire strap, which supports frequent changes between compatible carry setups.
Check on AmazonIf you click this link and buy, we earn a commission at no additional cost to you.
Treat flotation as a separate water specific requirement
A general binocular harness and a flotation strap solve different problems, so they should not be treated as interchangeable upgrades. A harness manages how the binocular rides on the body, while a floating strap is intended for situations where accidental drop into water is a realistic concern. Adding flotation to a dry land carry system can introduce bulk without addressing the original fit or access issue. Start with the environment, then choose the safety function that environment actually requires.
If water exposure is central to the outing, evaluate a floating binocular strap on its own requirements rather than assuming a chest carry system provides equivalent protection. Check the strap’s stated use, attachment method, and the weight or configuration it is designed to support. Do not infer flotation from thick padding or foam that was not specified for that purpose. Keep the water specific decision separate so the main carry system remains focused on access, fit, and load management.

This Steiner strap uses a padded high-visibility yellow floating jacket for marine binocular use. Its waterproof construction is designed to keep compatible binoculars afloat if they are dropped into water. Steiner uses its Clic-Loc attachment system on this floating strap for quick removal and reattachment.
Check on AmazonIf you click this link and buy, we earn a commission at no additional cost to you.
Use actual binocular measurements for compartment sizing
Enclosed carry systems make measurement discipline especially important because the binocular has to fit inside a real three dimensional space. Published internal dimensions are more useful than a generic size label, but only when you understand how those dimensions were measured. One sizing reference may list usable internal height, width, and depth with eyecups retracted, while another may tell the user to measure the binocular with eyecups set to the preferred viewing position. Those are not contradictory instructions, but they do show why measurement method matters.
For a practical fit check, measure the binocular in the configuration you normally carry and use, then compare those measurements with the stated interior space and closure design. The more detailed binocular harness sizing process should be used when the enclosure is close to the binocular’s dimensions or when eyecup position changes the overall length. Leave room for normal insertion and removal rather than chasing the tightest possible numerical match. A compartment that technically accepts the binocular but fights the lid or eyecups on every use is not a successful fit.

The SPIKA chest pack uses a fitted binocular compartment with a magnetic closure and a separate rangefinder pouch. The listed product dimensions are 7.09 by 3.54 by 8.66 inches. The enclosure uses treated 1000D nylon and a chest harness to carry the optic in a protected front compartment.
Check on AmazonIf you click this link and buy, we earn a commission at no additional cost to you.
Compare a harness and neck strap directly when the carry family is still unclear
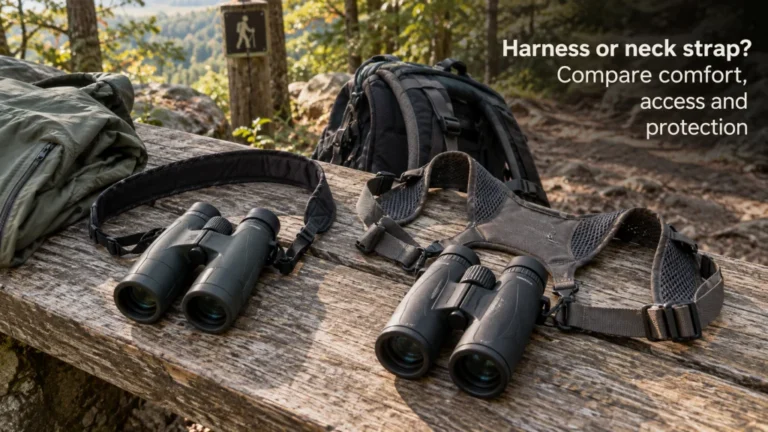
If you have not yet chosen a carry family, compare the simplest workable setups before adding complexity. A neck or shoulder strap has fewer parts and can be easier to remove, while an open harness spreads the suspension across more of the upper body and usually controls the resting position differently. An enclosed chest system adds protection and storage but also occupies more torso space. The right comparison is therefore not a feature count, but which tradeoffs matter during your actual viewing routine.
The dedicated binocular harness versus neck strap comparison is the better next step if you are still deciding whether you need a harness at all. Keep the existing strap if it already gives acceptable access, movement, and fit, especially with a lighter binocular and short outings. Move to a harness when the load path, movement, or repeated access pattern gives you a concrete reason to change. The goal is a carry system that disappears into the routine, not one that demands constant adjustment.

This black binocular chest harness uses adjustable sliding brackets to change the fit around the upper body. It is designed to support one optical device at a time through an open harness layout. The listing positions the strap for binocular use by hunters, photographers, and golfers.
Check on AmazonIf you click this link and buy, we earn a commission at no additional cost to you.
Final Thoughts: choose the carry architecture from load, access, and fit
A binocular harness should be chosen as a carry system, not as a generic comfort upgrade. Start with where the binocular needs to ride, how fast you need it, whether it needs enclosure protection, and what else already occupies your shoulders and chest. Then verify the binocular’s real dimensions, weight, attachment points, and connector requirements. Those checks eliminate more bad matches than chasing padding, pockets, or marketing language.
After the binocular fits, test the system against your body, clothing, and other gear before deciding that the setup is finished. Keep the simpler strap when it already works, choose an open harness when fast access and low bulk matter, and choose an enclosed chest system when protection and controlled storage justify the extra structure. Treat quick release and flotation as separate needs rather than default upgrades. A good result is not the most elaborate carry system, but the one that solves the original problem without creating a new one.

This OUFABE binocular harness uses an adjustable X-shaped double-shoulder layout for open carry. The nylon strap system is intended for birding, hiking, camping, outdoor survival, and search and rescue activities. It is sold as a decompression harness rather than an enclosed chest pack, keeping the binocular directly accessible.
Check on AmazonIf you click this link and buy, we earn a commission at no additional cost to you.
Explore the carry decisions in more detail
Harness selection becomes easier when each decision is separated into one question at a time. The pages below cover the comparisons that most often change the answer, from basic strap choice to compartment fit and connector workflow. Use the row that matches the uncertainty still left in your setup rather than reading every option as a required upgrade. That keeps the next step tied to a real carry problem.
If the overall architecture is already clear, go directly to sizing, attachment, or fit instead of reopening the whole decision. If the architecture is still unclear, start with the harness and strap comparison before considering more specialized systems. Water use belongs in its own branch because flotation is a different requirement from everyday carrying. The table is a navigation aid, not a shopping checklist.
| Topic | What you will find |
|---|---|
| Harness versus neck strap | Compare simple straps and harness systems by load path, access, movement, and interference. |
| Open harness straps | Work through open strap geometry, adjustment, attachment, and access tradeoffs. |
| Enclosed chest packs | Evaluate protection, compartment fit, torso coverage, and access. |
| Binocular neck straps | Decide when a simpler strap remains the better carrying solution. |
| Quick release straps | Check whether detachable connectors solve a frequent transition in your workflow. |
| Floating straps | Separate water specific flotation needs from general carrying needs. |
| Harness sizing | Measure the binocular and compare it with stated compartment dimensions and fit guidance. |
Once the remaining uncertainty has a name, use the matching page to verify it. Do not treat the whole list as equipment you need to buy or features every carry system should include. The cleanest setup may still be the simplest one. The decision is finished when the binocular fits, the attachment is compatible, and the carry method works with the rest of your gear.

This TIDEWE chest pack uses a magnetic closure, MOLLE webbing, and two detachable accessory pouches. The camo polyester harness is adjustable and measures about 7.09 by 2.76 by 6.89 inches overall. Its enclosed layout combines front-of-torso binocular storage with space for related field accessories.
Check on AmazonIf you click this link and buy, we earn a commission at no additional cost to you.
Frequently asked questions
Most harness questions become easier once the reader separates carry architecture from exact fit. The same harness type can behave differently with another binocular, another torso, or another set of outer layers. Connector details and enclosure measurements also vary enough that broad compatibility claims deserve verification. The answers below keep those conditions visible instead of pretending one system works for everyone.
If your question is really about discomfort, treat the carry system as a fit and load distribution choice rather than a medical solution. If it is about protection, decide whether you need an enclosure before comparing smaller details. If it is about access, think about how often the binocular moves to your eyes during a typical outing. That sequence usually narrows the options faster than comparing feature lists.
🎒 Is a binocular harness better than a neck strap?
Not automatically. A harness changes the load path and resting position, while a neck or shoulder strap keeps the system simpler and may interfere less with other gear. Choose based on binocular weight, access frequency, movement, torso fit, and the straps already in use.
📏 How do I know whether my binocular will fit a chest pack?
Measure the binocular’s length, width, and depth in the configuration you normally carry, including the eyecup position that affects overall length. Compare those measurements with usable internal dimensions and the manufacturer’s stated measurement method. Do not rely on a small, medium, or large label by itself.
🔗 Can any binocular attach to any harness?
No. Many systems use familiar strap points, but connector width, loops, lugs, clips, and proprietary hardware can differ. Verify the exact binocular attachment point and the carry system connector before assuming compatibility.
🧥 Should I fit a harness over my heaviest jacket?
It is sensible to check the thickest clothing combination you expect to wear. The system should retain enough adjustment range without placing buckles, straps, or the binocular in an awkward position. Recheck access after changing layers because torso geometry and strap routing can shift.
🌊 Do I need a floating strap if I already use a chest harness?
Only if water exposure creates a real drop risk and the flotation system is specified for your binocular’s weight and attachment method. A chest harness manages carrying and retention on the body, but that does not automatically make it a flotation device. Treat water safety as a separate requirement.
⚙️ Are quick release connectors worth having?
They are useful when you detach the binocular frequently for storage, a case, another carry system, or another user. If the binocular stays attached almost all the time, the extra hardware may solve a problem you do not have. Compatibility and secure attachment matter more than release speed.
References and Sources
These sources are included because the article relies on specific claims about load path, connector design, and compartment sizing rather than generic carrying advice. Manufacturer descriptions are used only for the physical features they document, not as proof of universal comfort or durability. Sizing pages show why usable internal space and measurement method matter when matching an enclosed system to a binocular. Community comments informed the practical questions around bounce, torso fit, layering, and gear interference, but they are not treated as technical proof.
The most important evidence boundary is compatibility. A published size chart can support a dimensional match only when the reader measures the binocular in a comparable way, and a connector description supports only the interface it actually specifies. None of these sources justifies assuming every harness fits every binocular or every body. That is why the article keeps final fit as a user level verification step.
- Celestron harness strap information: Documents a shoulder and upper back load path with adjustable flexible straps.
- Badlands binocular harness size charts: Publishes usable internal compartment measurements and explains the eyecup position used for those measurements.
- FHF Gear harness sizing guide: States that binocular length is central to fit and recommends measuring with eyecups at the preferred position.
- Maven strap connector information: Shows a specific loop attachment system with quick disconnect hardware, illustrating why connector style should be verified.
- Birding community discussion on straps and harnesses: Provides owner reported concerns about torso fit, layering, bounce, access, and attachment assumptions.